

Monetization using OpenMeter
Zuplo integrates with OpenMeter to handle metering, customer tracking, subscription plans and invoicing.
Our OpenMeter Policy allows you to track metered events as well as ensure that customers who are at, or over, the limit of their allowed plans, cannot continue to make requests.
This example demonstrates using our OpenMeter policy to:
- Track API requests in OpenMeter
- Check user access/plan limit to ensure requests are allowed
- Allow users to self-serve sign up and create API keys
- Assign a limited free plan to each new user
Prerequisites
-
OpenMeter Account: Sign up for OpenMeter's free cloud based account, or use the self-hosted version on infrastructure of your choice (including Docker and Kubernetes).
-
Zuplo Account: If you don't already have a Zuplo account you can sign up for free.
Get the example code
We recommend that you work with this example locally to give you the most flexibility. You can use the Zuplo CLI to set up a local copy using this example as a template:
Code
Setting up OpenMeter
The fastest way to run this project is to use the setup script to configure your OpenMeter instance with the expected features. Before you do that, you need to set up a few environment varialbles.
1. Copy the env.example file to create your .env file:
Create a new OpenMeter Secret Token. You can do this in the Integrations > API section of your OpenMeter dashboard:
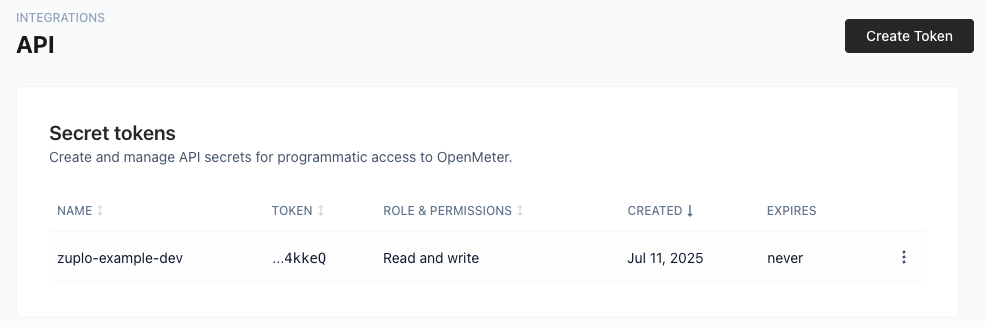
Then edit the .env file and add it to the OPENMETER_API_KEY variable.
2. Install Dependencies
3. Run the Setup Script
The script uses the OpenMeter API to:
- Create a meter with slug
api_requests_total - Create a new feature for
api_requeststhat users are given access to - Create a new free plan for users to be subscribed to by default with a limit of 10 requests
The script is idempotent, so you can run it multiple times safely. If the meter already exists, it will skip creation and notify you.
If you would prefer to set this up manually in OpenMeter, you can do so and skip running this script. Please refer to the OpenMeter documentation for Creating Meters, Subjects, Entitlements, Plans, and Subscriptions.
Setup Environment Variables
Once your OpenMeter instance is set up to work with this example, configure the rest of the required environment variables with information from your Zuplo account.
ZUPLO_API_KEY_SERVICE_BUCKET_NAME: For storing API key data. You can get the Bucket Name from the Services section of your Zuplo project

ZUPLO_DEVELOPER_API_KEY: An API key for working with your Zuplo accountZUPLO_ACCOUNT_NAME: The account name for your Zuplo account (eg.significant-lemon)
Example Project Overview
The example project is made up of an API gateway, and a Developer Portal.
- The API tracks requests into an OpenMeter instance using the OpenMeter Metering Policy
- The Developer Portal allows user creation, API key generation and management and connects to OpenMeter to allow those users access to the API, and assigns them a specific price plan.
API Overview
This example uses our Todo List API as a base. It's a simple CRUD API that allows users to create, update, and delete Todos and is centered around a mock API.
OpenMeter Overview
The OpenMeter policy is pre-configured in config/policies.json. This
configuration allows the API gateway to:
- Track API requests: Automatically meter each request that passes through your gateway
- Extract customer information: Use the API key metadata to identify customers
- Send metering data: Forward usage data to OpenMeter for tracking and billing
The policy runs on the POST and GET routes, but not on DELETE (but you're
welcome to add it).
The policy will check if a user has access and/or balance left on their plan by calling the OpenMeter API, and if they do it will allow the request and meter the event in OpenMeter.
You can see the configuration for the OpenMeter Policy in
config/policies.json.:
Code
How Users Are Identified for Metering
When a user creates an API key their corresponding SubjectId from OpenMeter is
added to the metadata for each API key as openmeter.subjectId.
This allows the OpenMeter policy to correctly identify the user and meter against their OpenMeter Subject ID regardless of whether the API key is used in the Dev Portal, an HTTP testing tool such as HTTPie, or in another application.
If the user creates multiple API keys, they will all have the same subjectId
assigned to them.
This implementation is just an example to help you understand the concepts of
working with Zuplo and OpenMeter. There are multiple places that the subjectId
could be stored and retrieved depending on your IDP and use cases.
Running Locally
All the setup steps are complete! Now it's time to run the example locally.
- Start the servers for the API gateway by running
npm run dev - Next, start the developer portal server by running
npm run docs - Test that everything is set up correctly by loading the developer portal an opening http://localhost:3000 in your browser. It will load the API reference for the Todo API.
- Use the API playground to test the Get all todos route. It should
return
401 Unauthorized.

Creating a user
Conceptually, creating a user via the Developer Portal would be the same as a user signing up for your service. In this example, users are created on the Zuplo Auth0 test account that all developer portals are provided with by default.
- Create a user by clicking Login
- On the sign in page, click on Sign up
- Register an account (Google Single Sign-On is fastest for testing)
- Once registered you will be logged in and returned to the API Reference
Create an API Key
The Zuplo Developer Portal supports the creation and management of API keys directly from within the portal itself.
- Click on your name, and then on API Keys
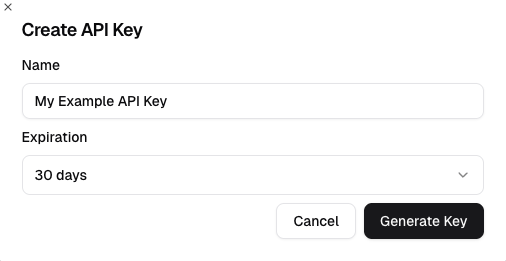
- Click on Create API Key
- Give your API a name (this will display in the portal)
- (Optional) Set a key expiry date
- Click Generate Key
Your key will be generated, but there's also some OpenMeter magic that happened in the background.
Let's explore that more so you can understand how this all fits together.
How API Key Creation & OpenMeter Are Linked
When an API key is created for the first time by a new user, several additional API calls are made to the OpenMeter API:
- Add the user to OpenMeter as a new
Subject - Give the user an OpenMeter
Entitlementto access the API in a metered way - Subscribe the user to the Free plan so limitations can be enforced (the free plan in this example allows 10 requests)
Additionally, the OpenMeter Subject ID for the user is added to the API key metadata that is referenced by the OpenMeter Policy in the API gateway to keep everything linked together.
You can see the full source code for this in modules/apiKeys.ts.
OpenMeter is incredibly flexible, as is the Zuplo Developer Portal, so there are many ways that a similar flow could be created for your users at various times in their lifecycle, as well as from other places such as your own website. This example serves as a guide to the steps that need to be taken, and you can adapt them for your own use case.
Test As a Registered User
At this point you are considered a registered user of the Todo API, and you've been given access to all 10 API requests that the Free plan offers (use them wisely!).
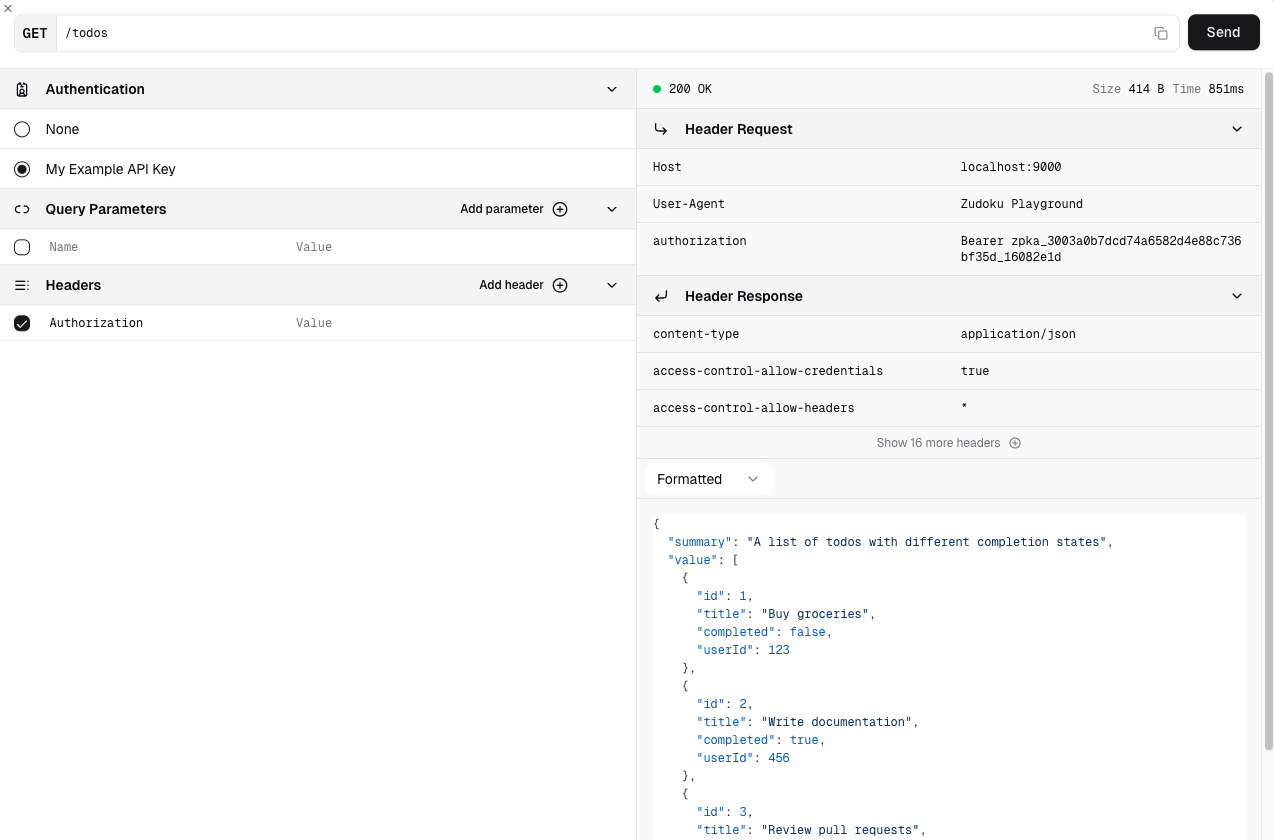
- Head back to the API Reference, and click the Test button to load the API Playground once again.
- You will see that your API key has become available to select. You can use this to make authenticated requests against the API that will be metered against the available quota on your free plan.
- Select your API key and make the request again, you should see a list of
todos returned and get a
200 OKresponse.
Once you use all your available quota, you will no longer be able to make requests.
Adding Billing & Payment
All of this can be done directly with OpenMeter, and you can reflect as much or as little of that back into your Developer Portal as you'd like. Recommended next steps for this would be:
- Add some paid plans to your OpenMeter instance
- Connect your OpenMeter instance to Stripe (or PayPal, or Adyen) to handle billing and payments
- Create a custom pricing page in the developer portal that allows logged in users to switch between plans and provide the necessary credit card information
Please see the OpenMeter documentation for more details on how to do this.